Reflective Tape Layout Planning
Review tape interruptions, zip crossing, logo placement and the approval checks that prevent costly rework.
Read the reflective tape layout guide
Use these hi-vis jackets buying guides to turn a hi-vis jacket idea into a clear, production-ready brief. Each guide focuses on one decision that affects visibility, comfort, branding, sampling and repeat orders. Use the related article cards below, then contact the custom hi-vis jackets manufacturer with your approved brief.
The six articles cover reflective tape layout, layering allowance, certification document review, cleaning and replacement records, storage handling and wearer information. Use the hi-vis jackets buying guides to connect these decisions to one model revision. Record the destination, intended use and responsible reviewer before developing a sample; a well-presented jacket is not, by itself, evidence of an accepted protective classification.
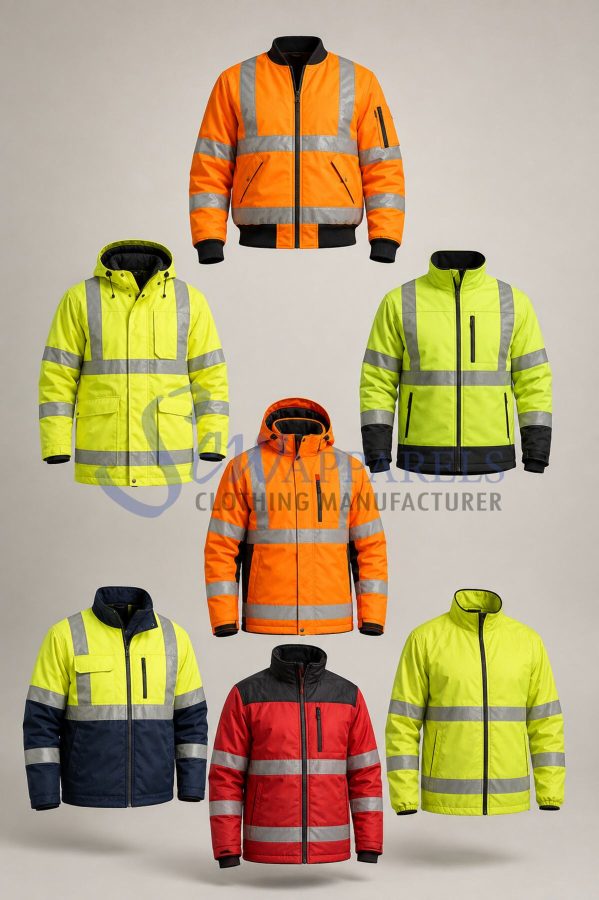
Review tape interruptions, zip crossing, logo placement and the approval checks that prevent costly rework.
Read the reflective tape layout guideSet inner layer room, cuff adjustment and hem coverage so hi-vis jackets remain comfortable and consistent across sizes.
Read the layering allowance guideReconcile the exact jacket model, colour and size scope with declarations, assessment documents, test reports and proposed customisation before procurement release.
Read the certification document review guideConnect garment identity and care instructions with actual cleaning events, condition reports, responsible review and replacement issue records.
Read the cleaning and replacement records guideKeep new stock, clean returns and held garments identifiable while preserving the correct care documents, storage observations and issue status.
Read the storage and handling guideMatch the supplied model with complete instructions, care information and language needs while keeping training roles, receipt records and document updates clear.
Read the wearer information guideA hi-vis jacket must remain visible while the wearer bends, reaches, drives, climbs or works over a base layer. Begin with the intended user and climate rather than copying a generic size chart. Record the base garment, expected layering, body measurements, sleeve length and finished garment measurements. A jacket that looks correct on a static mannequin can restrict movement when a worker reaches forward or raises both arms. Ask the factory to show front, back and side measurements, then review the first sample on a real wearer or fit model.
Movement allowance should be deliberate. Add room at the chest, upper arm and back where the jacket must move, but control excess volume so the tape remains in a predictable position. Check the hem while the wearer sits, bends and reaches. Review sleeve opening, cuff adjustment, hood interaction and pocket access with gloves if the product is for outdoor work. A simple movement test catches problems earlier than a long message after bulk production starts. Record every accepted measurement in the approval file so the next size set follows the same logic.
For graded sizes, confirm that tape lines, pocket openings and logos still look balanced after grading. Ask for a measurement chart with tolerances, not only a single sample size. This makes quality inspection clearer and protects the design when an order is repeated. The hi-vis jackets buying guides and your product specification should always point back to one approved revision so buyers do not work from conflicting versions.
Reflective tape is part of the jacket architecture. Map the tape before placing pockets, zippers, vents or logos. Identify every interruption and explain how the tape resumes on the other side. A zipper crossing, seam or pocket flap can change the visual continuity of a band, so it should be shown in a marked drawing. Specify tape width, colour, base material, edge finish and intended application method. If a design uses segmented tape, state the segment size and repeat so production does not rely on interpretation.
Review the front, back and sleeve layout together. A front-only drawing cannot establish how bands align around the side seam or whether branding changes the assessed configuration. Use a marked drawing, reference dimensions and the finished sample to discuss changes with the responsible manufacturer or assessor. Do not invent a universal safe logo area or treat a visually continuous band as proof of conformity.
HSE PPE product safety and supply guidance explains the Great Britain framework and distinguishes the responsibilities of manufacturers, importers and distributors. Your Europe conformity assessment guidance describes the EU context, product-specific routes and the need to check a notified body’s appropriate scope. These are jurisdiction-specific references, not a certification statement for a Sew Apparels product. Use the hi-vis jackets buying guides to match actual documents to the exact ordered model, colour, sizes and proposed modifications.
Choose the shell and lining around the actual job. Decide whether the jacket needs wind resistance, rain protection, breathability, insulation or easy laundering. State fabric composition, weight, finish, colour standard and acceptable shade tolerance. A fabric choice also affects drape, noise, warmth and how tape is applied. If the garment will be layered, test the finished sample over the intended base layer rather than reviewing the shell alone.
Use the hi-vis jackets buying guides to review closures with the same precision as fit and tape placement. Record zipper type, slider direction, puller size, storm flap construction, snap positions and cuff adjustment. Check that the zipper does not create an unplanned tape interruption and that the wearer can operate it while wearing gloves. Pocket locations should be tested in working positions. Include reinforcement, bartacks and seam finishing where repeated movement could create stress. A clean technical brief reduces the number of subjective changes during sampling.
Prepare artwork as a production instruction, not only as a marketing image. List logo dimensions, decoration method, thread or ink colours, placement measurements and minimum clear space. Show whether the logo sits above, below or beside a reflective band. A small annotated front and back sketch is often more useful than a paragraph because it lets the sample room see the intended relationship between branding and visibility.
Approve in stages: first the measurement chart and tape map, then the fabric and trim sample, then the decorated fit sample, and finally the pre-production sample. Save comments against a dated version. When a change is accepted, remove obsolete drawings from the active approval folder so the factory cannot select the wrong file. This process helps both established buyers and a startup brand that needs a reliable first order without unnecessary sampling cycles.
A low MOQ hi-vis jackets manufacturer can be useful when a startup brand is testing a new workwear range, but a small order still needs a complete brief. Set the target quantity, size ratio, colourway, decoration locations, packaging and delivery window before asking for a quote. Separate must-have requirements from optional upgrades so the first sample answers the most important commercial questions. A clear brief helps the supplier estimate material use and lets the startup team compare quotations fairly.
A startup brand can use the hi-vis jackets buying guides to prepare a focused first-project enquiry with the destination, intended use, proposed jacket specification and evidence requirements. Share the measurement chart, tape layout, artwork and realistic order quantities. Ask which requirements the manufacturing team can accept, who is responsible for conformity review and what documentation is needed before quotation. A smaller order does not remove protective-clothing obligations or justify an unsupported certification claim.
Confirm sample charges, material availability, development revisions, lead-time assumptions and the accepted minimum order quantity for the specific project. No fixed MOQ or priority service is established by this guide. Keep the approved model and instruction revision with the order record. Plan how the receiving team will identify the garment, retain cleaning and replacement records and escalate an unexplained label or construction change. This gives a new brand a clearer approval process without promising performance or services that have not been agreed.
Use the six hi-vis jackets buying guides and the product-specific checks above as a buyer checklist. Send the destination requirements, intended use, completed tape map, measurement chart, fabric and trim direction, logo artwork and planned quantities for a structured development and quotation review. Keep unresolved evidence questions visible until the responsible party has answered them.
Contact the hi-vis jackets manufacturing team