Reflective Trim Attachment
Compare stitched and heat applied tape, edge security, curved sections and production approval.
Read the reflective trim attachment guide
Use these hi-vis vests buying guides to prepare a clear brief before sampling. Six linked articles address reflective trim attachment, ordinary closure selection, breakaway claim evidence, procurement use cases, size-range evidence and visitor loan stock. Connect the technical specification with its destination requirements and approved model identity, then send the agreed manufacturing scope to the custom hi-vis vests manufacturing team.
Begin by identifying the wearer, task, lighting conditions and intended base layer. Give the factory a front, back and side drawing, a size range and a trim map. Separate a visibility requirement from a decoration preference so the sample can be checked against the brief. Test the actual vest in movement and after the planned care route before accepting a production standard.
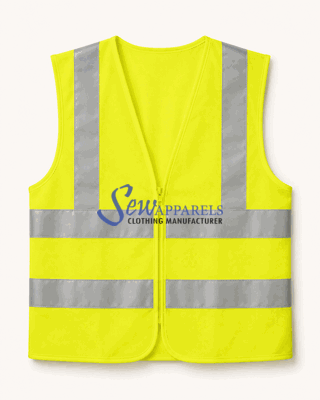
Compare stitched and heat applied tape, edge security, curved sections and production approval.
Read the reflective trim attachment guideCompare zipper, hook and loop and front overlap for fit, visibility and repeat production.
Read the vest closure selection guideReconcile the exact release configuration, assessment scope, accessory interactions and supplier limitations before accepting a breakaway claim.
Read the breakaway evidence guideConnect the work environment, visitor and worker needs, equipment compatibility and assessed inputs to a clear purchasing specification and handover.
Read the procurement use case guideMatch every ordered size and colour with the exact model, document revision and modification review before accepting the complete vest range.
Read the size range evidence guideControl approved models, garment identifiers, issue and return records, care status and replacement history. Separate returned or held vests from usable stock and keep visitor information limited to the defined purpose.
Read the visitor loan stock guideUse the hi-vis vests buying guides to review the front, back and sides together: a vest is viewed from several directions. Mark every horizontal or vertical tape line, closure crossing, pocket edge, shoulder area and arm opening. Show where the tape stops and resumes. After grading, check that the band remains balanced on small, medium and large sizes. A layout that looks right on one sample can drift toward the armhole or hem on another size.
Record control measurements and tolerances instead of relying on a photograph. Note the distance from the hem, side seam, armhole and zipper. If a logo or label sits close to a reflective band, show the safe zone in the drawing. The sample room should be able to compare the flat sketch with the finished vest without guessing which line is important.
Check the layout on a fastened vest and on each approved size, including the smallest and largest grades. Record whether the side seams and closure interrupt a continuous band. Photograph the approved sample from front, back and both sides under the agreed review conditions. Keep those views with the technical pack so a repeat order can be checked against the same landmarks rather than a single attractive front image.
The hi-vis vests buying guides help you compare mesh, solid polyester, coated fabric and stretch panels, which respond differently to stitching and heat. Needle penetration can create puckering or weaken an open mesh; a bonded tape can lose adhesion if the surface, temperature or pressure is wrong. Test the actual fabric and tape combination before approving a full garment. Include tape width, backing, edge finish, thread or adhesive, and the intended care process in the technical file.
For heat applied tape, record temperature, pressure, dwell time and cooling. For stitched tape, specify stitch rows, thread, edge distance, overlap and acceptable tension. Keep corners, curves and side joins in the trial because a straight centre strip does not prove that a curved armhole will remain secure.
Run an attachment trial on the exact production fabric and trim combination. A mesh ground, coated shell and stretch panel can respond differently to the same heat, pressure or stitch path. After the intended wash or care process, inspect tape edges, base-fabric distortion, hand feel and flexibility while the wearer bends. Write down the equipment settings and acceptable appearance so bulk quality checks use the approved method.
Inspect the locations most likely to fail: corners, armholes, pocket openings, side seams and zipper crossings. Flex the vest, apply the stated care process and review the tape edge again. Look for peeling, bubbling, loose stitches, thread tails, puckering, gloss change and uneven alignment. If a defect is repaired, confirm that the repair does not create a new interruption or an inconsistent reflective surface.
Approve in stages: base fabric and tape first, then a front and back construction trial, then a complete decorated fit sample. Save the sample version, tape lot, process setting, date and agreed tolerances. A manufacturing appearance review should remain distinct from the qualified evidence required for a protective claim.
CCOHS high-visibility safety apparel guidance, a Canadian reference, discusses jurisdiction requirements, worksite assessment, fit, visibility and other features that may be required by the hazards. HSE PPE selection and use guidance addresses the Great Britain context, including fit, compatibility and wearer instruction. Neither reference certifies a Sew Apparels vest or supplies a universal release-force limit. Obtain the relevant standard edition, destination requirements and competent assessment for the exact model and proposed configuration.
For logo planning, use the hi-vis vests buying guides to prepare artwork as a production instruction. State logo dimensions, decoration method, clear space and exact position relative to the tape. Show front and back views and identify any area where a logo must not cross. Approve the decorated sample under the lighting and movement conditions expected at work. Keep artwork, tape map and measurement chart together so the factory does not use conflicting versions.
Treat artwork approval as part of the visibility layout. Supply the logo file, final size, colour, placement measurements and decoration method. Ask the sample room to check whether embroidery backing, heat-transfer edges or label stitching changes the drape or covers a planned reflective area. Review the design on the smallest and largest vest sizes, because the available clear space changes with grading. Keep one approved placement drawing with the signed sample, and require a new review if the logo size or closure changes.
A low MOQ hi-vis vests manufacturer can help a startup brand test a workwear range, but a small order still needs a complete brief. State quantity, size ratio, base fabric, tape method, colours, closures, logo locations, packaging and delivery target. Ask which trims are practical at the proposed quantity and which process is most repeatable across colours.
For a first order, control the number of fabric colours, tape constructions and closures. Ask the supplier to confirm current minimum quantities for the chosen materials, not a general promise that every option can be made in any volume. Separate sample cost, revision scope and bulk production timing in the brief.
A startup brand can use the hi-vis vests buying guides to prepare its first hi-vis vest enquiry. Define the destination, intended work setting and responsible reviewer before choosing the trim map or decoration. Share annotated drawings, material references, the required instruction scope and realistic quantities. Ask which development requirements the manufacturing team can accept and what evidence responsibilities remain with the buyer, employer or qualified assessor.
Confirm material minimums, sample charges, revision scope and delivery assumptions for the specific project; this guide establishes no fixed MOQ or guaranteed priority service. Keep measurable comments against a dated sample revision and close open questions before procurement release. Check how ordered sizes, logos, attachments and closures relate to the accepted model documentation. Plan garment identification and usable-stock counts for visitor issue and return, with unnecessary personal information excluded. A smaller first order still needs clear care information, claim boundaries and an agreed handover.
Use the related guides and the product-specific checks above as a buyer checklist. Send the trim map, fabric specification, closure details, measurement chart, logo artwork, planned quantity and destination to the manufacturing team. Ask for a sample review and written approval points before the bulk order.
Contact the hi-vis vests manufacturing team