
Lab coats coat length and mobility must be developed together because a longer silhouette changes sitting comfort, stair movement, pocket position, front overlap and the force carried by the back vent. A short coat may move easily but provide a different professional proportion and garment coverage. A long coat can look traditional yet feel restrictive if the sweep, vent, sleeve and layered fit are not coordinated. This guide gives product developers a measurable method for specifying coat length, back-vent construction, seat coverage and sleeve reach from sample approval through bulk inspection.
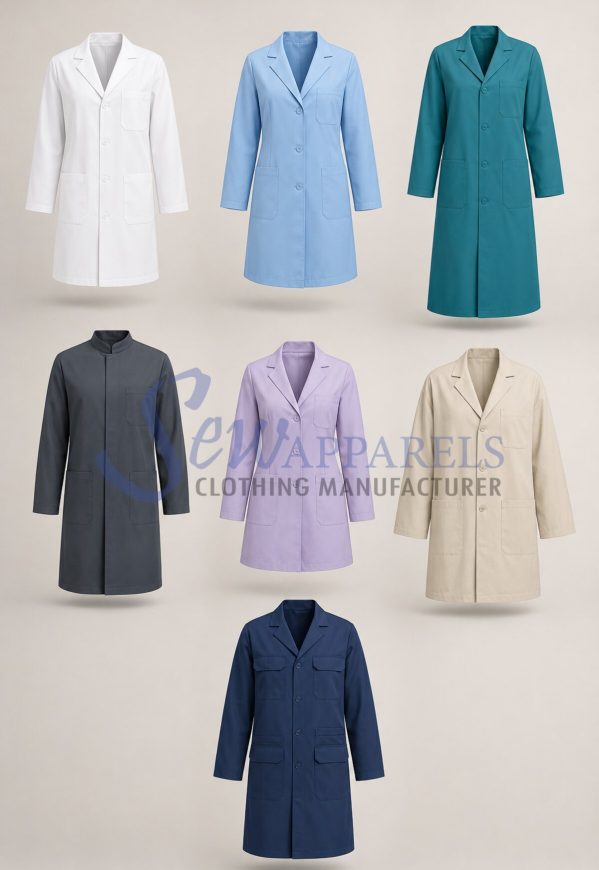
1. Define the work setting and intended lab-coat silhouette
Start with the wearer role, underlayer, work posture, coat length direction and front-closure habit. A consultation coat used mainly while seated may need a different length and vent from a knee-length style used for standing, walking and laboratory routines. State whether the coat is normally open, partly buttoned or fully closed. Record any chair, bench, equipment or pocket-load condition that influences movement.
The technical brief should include centre-back length, side length where relevant, chest and hip ease, sweep, vent type and length, front overlap, pocket position, sleeve length, bicep, cuff opening and intended grade. Define the measurement condition: garment fastened or open, laid naturally, pressed and conditioned. Lab coats coat length and mobility becomes repeatable when the visual direction and the points of measure describe the same approved sample.
2. Engineer the lab coats back vent for movement
A lab coats back vent releases the lower coat during sitting, walking and step movement while preserving a clean upper-back line. The buyer should choose a centre vent, side vents or another controlled opening according to the silhouette and work activity. Vent length, overlap, underlay, seam allowance, reinforcement and hem integration affect both mobility and appearance. A vent that is too short may remain under tension, while an excessive opening can flare or expose the underlayer.
Develop the vent with the final coat length and hip ease. A narrow sweep cannot be rescued by a small vent if the wearer still needs more circumference while seated. Check whether loaded lower pockets pull the vent open or distort the side seams. Review the coat from the back and side during standing, normal walking, a high step and seated posture. Note the point at which the vent begins to open and whether it returns cleanly afterward.
3. How to specify back vent for lab coats
When deciding how to specify back vent for lab coats, provide finished vent length from a stable reference, overlap width, underlay shape, seam and stitch type, top reinforcement, topstitching, hem treatment and pressing direction. State whether the length is measured from the neckline, finished hem or vent opening point. Show the right and wrong overlap direction if the design is asymmetric.
Use a production-intent sample to test repeated sitting and rising, walking, stair movement and forward reach. Inspect the vent top for stress, seam slippage, broken stitches or fabric distortion. The active ASTM D1683/D1683M-22 sewn-seam test method measures sewn seam strength and efficiency in woven fabrics and can support buyer-specified evaluation of critical seam assemblies. It does not predict wear by itself, so acceptance criteria and the exact assembly must be agreed for the product.
4. Set lab coats seat coverage from the approved posture
Lab coats seat coverage should be defined in the normal wearing condition, not from a vague term such as “mid length.” The hem position changes when the wearer sits, reaches or loads lower pockets. Decide whether the product needs partial, full or below-seat coverage as a visual and functional design choice. Record the base-size centre-back length and the body landmark used during fit review without describing ordinary uniform coverage as protective performance.
Coverage must be coordinated with front length, hip ease and sweep. A longer back combined with insufficient hip room can ride upward and create less real coverage when seated. A straight hem, shaped hem or side split also changes how the coat settles. Review representative wearers or fit forms with the intended underlayer, then photograph the accepted standing and seated positions from consistent angles.
5. How to specify seat coverage for lab coats
For how to specify seat coverage for lab coats, identify the centre-back length point, collar or neckline reference, finished hem line and fit-review landmark. State whether the collar stand or fall is included. Add front length, side length, sweep and vent dimensions so the coverage is not controlled by one number alone. If the style uses a shaped hem, include a diagram of the curve and its relation to side seams.
Fit the base size, then review a smaller and larger size because grade increments affect the relationship between body height, torso length and garment hem. Do not increase every size by the same visual assumption without checking the intended market. During approval, confirm that the coat does not bunch behind the chair, pull at the closure or expose a vent underlay that should remain hidden. Retain dated photographs with the measurement chart.
6. Plan lab coats sleeve reach with the armhole and back
Lab coats sleeve reach depends on more than finished sleeve length. Shoulder width, sleeve pitch, armhole depth, bicep ease, across-back width, underarm shape and cuff opening determine how far the wearer can reach before the body lifts or the cuff retreats. A sleeve can meet a flat measurement and still restrict movement if its pitch or armhole balance does not match the intended posture.
Define the underlayer and wrist coverage direction before pattern approval. Review forward reach, overhead reach, writing, computer use and an across-body action. Observe whether the centre back pulls, the shoulder seam travels, the armhole cuts into the body or the hem rises excessively. Sleeve mobility should be balanced against a clean professional silhouette; simply adding volume everywhere can create an oversized coat without solving the underlying pattern relationship.
7. How to specify sleeve reach for lab coats
Document how to specify sleeve reach for lab coats with sleeve length, shoulder point, bicep, elbow, cuff opening, armhole and across-back measurements. State whether sleeve length follows the curve or a straight line and whether it is measured from centre back, shoulder seam or another defined point. Include sleeve pitch and notch references in the pattern instructions when the construction team needs them.
Use a movement checklist with the intended cuff and closure. A narrow plain cuff, elastic finish, knit cuff or adjustable tab changes wrist movement and layering bulk. Mark the acceptable cuff position in neutral and extended postures. After the intended wash and dry cycle, repeat the reach test because sleeve shrinkage, seam growth or fabric relaxation can alter the result even when the original sample passed.
8. Coordinate coat length, pockets, closure and walking ease
Longer coats place lower pockets farther from the waist and can create more swing around the thighs. Pocket depth, load, opening angle and reinforcement should be reviewed with the hem and vent. A heavy pocket can pull one side down, force the vent open or make the coat strike the leg. Place pockets from stable garment references and test them with approved contents instead of evaluating an empty coat.
Front closures also influence mobility. Button spacing, snap position and concealed plackets control where the coat can spread while sitting. Confirm that the first lower closure is not positioned at the point of greatest hip tension. Review the front and back together: adding a deeper vent may improve one movement while creating a gaping or asymmetrical back if front circumference and pocket load remain unresolved.
9. Measure and grade the mobility system consistently
ISO 18890:2018 garment measurement guidance defines main garment measurement points and methods and allows additional points to be agreed between interested parties. Use that approach for centre-back length, front length, sweep, vent opening, sleeve length and product-specific mobility references. The measurement chart should state how the coat is laid, fastened, pressed and conditioned.
Grade length and movement deliberately. The same vent length across all sizes can become visually short on a larger coat, while a fixed pocket-to-hem distance can change useful access. Review grade rules for torso length, hip, sweep, sleeve and vent together. Approve representative sizes and compare movement photographs side by side. Bulk inspection should verify measurements and workmanship because a coat can meet length tolerance yet fail if the vent, hem or sleeve is twisted.
10. Prevent lab coats coat length and mobility mistakes
Common lab coats coat length and mobility mistakes include choosing length only from a fashion image, using “knee length” without a measurement, adding a vent without enough sweep, ignoring seated posture, defining sleeve length without reach checks and grading the body without reviewing vent and pocket placement. Other failures include measuring from inconsistent collar points, approving an empty coat only and checking mobility before laundering.
Do not claim that coat length, coverage or a back vent provides chemical, biological or other protective performance unless a defined protective specification and suitable evidence support the claim. This development brief controls ordinary garment proportion, fit, movement and construction. Keep a change log for length, sweep, vent, sleeve, pocket, closure and grade revisions so later samples and repeat orders retain the approved balance.
11. Use a buyer decision table and sealed approval checklist
| Decision | Specification evidence | Approval check |
|---|---|---|
| Coat length | Back, front and side length points with fit photographs | Standing, walking and seated proportion across sizes |
| Back vent | Length, overlap, underlay, seam, reinforcement and hem | Opens for movement and returns without distortion |
| Sleeve reach | Sleeve, shoulder, bicep, armhole, cuff and pitch references | Reach actions before and after the intended care process |
| Bulk control | Grade rules, tolerances, movement sample and inspection plan | Compare selected units with the sealed approval set |
Final lab coats coat length and mobility approval should include production-intent fabric and trims, the full measurement chart, graded samples, loaded-pocket movement review, washed sample and inspection checklist. Record the fit posture, underlayer and buttoning condition used for approval. Brands can review the manufacturing scope on the custom lab coats product page and find related decisions in the Lab Coats Buying Guides hub. One controlled length-and-mobility brief gives pattern, sample, sewing and quality teams the same measurable target.
Final sample handover
Keep a dated revision log with the approved pattern, material codes, measurement chart and fit photographs. For each change, identify the original observation, the revised construction and the movement that must be repeated. If a longer back vent improves sitting but causes the hem to flare, record both outcomes before accepting the revision. A flat measurement within tolerance does not replace a worn-sample check.
Before releasing bulk production, the buyer and sampling team should agree which sample is the reference, which sizes were reviewed and which care condition was used. Mark any unresolved item as a hold point rather than describing the entire style as approved. When the shell fabric, underlayer or size range changes, repeat the affected checks and attach the new results to the same development record.
