
LAB COAT PRODUCT DEVELOPMENT
Lab Coats Buying Guides
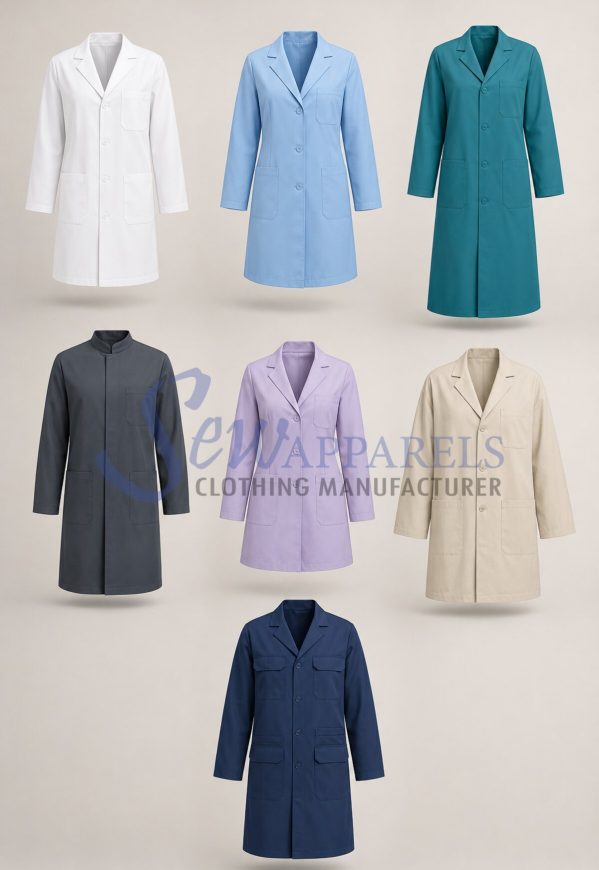
These lab coats buying guides provide a practical development hub for brands planning professional lab coats. Use them to control collar geometry, lapel proportion, interlining, fit, pockets, closures, laundering and bulk inspection without making unsupported protective claims.
 Review the Lab Coats product page
How to use these lab coats buying guides
Each guide converts one development decision into measurable requirements, sample checks and bulk controls. Begin with the approved wearer profile, coat length, fit block, fabric, closure and care route. Then document construction points, measurement references, tolerance, test method and visual standard. Keep the sealed sample, technical pack and change log together so pattern, cutting, sewing, pressing and inspection teams work from the same version.
Review the decision on production-intent material, not a substitute swatch, and record the garment condition used for appearance approval. Buyers should compare small, base and large sizes where grading can change proportion. Related articles will be added here as the permanent keyword plan progresses, and every card will continue to link directly to the matching article while the product-page route remains clear.
Plan collar and lapel construction as one system
A lab coat collar cannot be approved from lapel width alone. Neckline length, collar stand, fall, roll line, gorge, notch, break point, front closure and shoulder balance determine how the front settles. Define whether the coat will be worn open or closed and review it over the intended underlayer.
Production-intent fabric and interlining must be used because drape, thickness and fusing response change the final shape. Measure both sides, check symmetry and photograph the accepted buttoning condition.
Coordinate fabric, interlining and pressing
Lightweight poplin, structured twill and stretch woven lab-coat fabrics need different support. Specify interlining supplier reference, weight, colour, adhesive, grain direction, component coverage and fusing settings. Approve a fused swatch and finished sample after the intended care process.
Check bubbling, ridging, strike-through, stiffness, shrinkage and edge roll after cooling. Pressing should refine a stable construction, not force an unstable collar into shape for a short inspection window. Record temperature, pressure, dwell and cooling conditions when they are critical.
Balance professional fit with movement and layering
Professional appearance depends on shoulder balance, chest ease, across-back width, armhole depth, sleeve pitch, bicep allowance, coat length and lower sweep. Fit the garment over the clothing normally worn beneath it and review reaching, writing, sitting and pocket access.
A base-size approval does not prove the grade, so inspect representative small and large sizes. Confirm that the collar remains centred, the front edges stay vertical and the hem does not swing when pockets are loaded.
Develop pockets, closure and branding together
Chest pockets, lower patch pockets, internal storage, buttons, snaps, concealed fronts, embroidery and name identification compete for the same front area. Map every component from stable seams and finished edges. Define usable pocket dimensions, closure spacing, artwork size and clearances before sampling.
Load pockets with approved items and repeat movement checks. Branding should not distort the fabric, collide with the lapel or reduce pocket access. Sealed placement templates help repeat orders maintain the same presentation across sizes and departments.
Verify laundering, measurement and workmanship
Finished garment review should cover dimensional change, front alignment, collar shape, lapel roll, sleeve length, pocket distortion, seam puckering, trim function and overall twist after the specified care route. Use clearly illustrated points of measure and state the garment condition for inspection.
Agree additional collar and lapel points where standard charts do not capture the product. Compare selected bulk units with the sealed sample under consistent lighting and resting conditions, and isolate any material or process change that could affect appearance.
Low MOQ lab coat development for startup brands
Startup brands often need disciplined development before committing to a broad lab-coat range. Low MOQ feasibility depends on fabric availability, colour, size count, embroidery, labels, trim customisation and packing. Sew Apparels gives startup-brand enquiries structured review and confirms the practical quantity after the complete brief is assessed. A focused opening style, stock-compatible material and controlled size range can reduce complexity.
The brand should still approve production-intent materials, measurements, decoration and care performance before bulk production. Keep the first range commercially focused: one dependable block, a clear collar option and a limited trim set are easier to cost and repeat than many small variations. If custom fabric, dyeing, interlining or personalised names increase the feasible minimum, identify that during quotation. Startup buyers should receive the same documented sample, measurement and bulk-quality controls used for an established program.
Build a repeatable approval and reorder record
A useful lab coat file contains the current pattern version, measurement chart, graded rules, material references, interlining map, stitch and seam instructions, button and buttonhole positions, artwork files, labels, packing data and approved photographs. Record the reason for every revision and identify who approved it. When a new fabric lot or construction method is proposed, resample the affected area instead of assuming equivalence.
Include dated collar and lapel photographs from the front, side and back, plus notes on buttoning condition, pressing, cooling and laundering. A bulk inspection sheet should identify visible defects, measurement frequency, tolerance and escalation steps. Retain approved swatches and trim codes with the purchase order so warehouse and production teams can check substitutions early. This discipline supports costing accuracy, bulk inspection and later replenishment without changing the original product-page content.
FEATURED BUYER GUIDE
Lapel And Collar Construction: Lab Coats
Specify collar roll, lapel width, neckline balance, interlining zones, seam construction, pressing and post-care approval through one controlled development method.
Read the lapel and collar construction guideFEATURED BUYER GUIDE
Coat Length And Mobility: Lab Coats
Specify coat length, back-vent construction, seat coverage, sleeve reach, graded mobility, laundering and bulk inspection through one controlled development method.
Read the coat length and mobility guideFEATURED BUYER GUIDE
Embroidery Quotation: Lab Coats
Use seven critical checks to compare artwork, logo size and placement, thread assumptions, backing, pocket access and personalization. Separate digitizing and sample work from recurring charges, then keep a like-for-like RFQ and decorated-sample approval record.
Read the embroidery quotation guideFEATURED BUYER GUIDE
Spare Trim Reorder Programme: Lab Coats
Use six critical checks to identify replacement buttons and snap sets, approve attachment compatibility, choose quantities from maintenance records and allocate stock ownership. Keep component codes, storage labels and supplier-confirmed reorder terms in one controlled register.
Read the spare trim reorder guideFEATURED BUYER GUIDE
Tender Specification Checklist: Lab Coats
Use six critical checks to define intended use, separate ordinary uniform requirements from protective claims and allocate evidence reviews. Compare materials, laundry, identification, samples, packing and supplier exclusions only after bid scope has been clarified.
Read the tender specification guideFEATURED BUYER GUIDE
White Fabric Yellowing Investigation: Lab Coats
Use six critical checks to collect retained and affected samples, trace lot and care histories and compare white appearance under agreed conditions. Separate storage, packaging, laundry and component observations before deciding on a material substitution or allocating responsibility.
Read the white fabric yellowing guideTechnical references for measurable lab-coat development
Use official methods as a framework and define product-specific acceptance criteria. ASTM D6193-16(2025) covers stitch and seam characteristics used in sewn items and explains why stitch type, seam configuration, thread and material variables must be balanced for strength, elasticity, durability, security and appearance. ISO 18890:2018 defines main garment measurement points and methods and allows additional points to be agreed by interested parties. Apply that principle to collar stand, fall, collar-point length, gorge position, lapel width, break point and other lab-coat-specific dimensions. The standard links below support a controlled technical conversation; the buyer still needs to state the exact procedure, sample quantity, conditioning, tolerance and acceptance level required for the product.
Open ASTM D6193 stitch and seam practice Open ISO 18890 garment measurement standardTurn your lab coat development decisions into a product brief
Share the intended wearer, coat length, fit block, fabric, collar, lapel, closure, sleeves, cuffs, pockets, branding, size range, care route and packing requirements. The product page explains the available manufacturing scope, sampling path and buyer information needed for focused costing.
Review custom Lab Coats manufacturing