
Tank top shoulder seam durability cannot be judged from stitch count or visual neatness alone. A narrow shoulder or strap joint carries garment tension through a small area, yet added reinforcement can create hard edges and uncomfortable skin-side bulk. The correct development process compares strength, extension, appearance and contact comfort on the actual fabric, seam and strap width proposed for production.
This guide gives buyers a practical shoulder-joint approval route. For related product decisions, visit the tank tops buying guides. To discuss product development and quotation requirements, use our custom tank top manufacturing page.
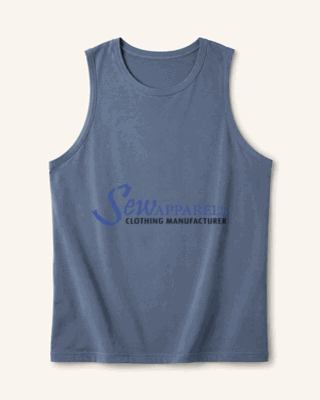
1. Map the tank top shoulder seam durability load path
Identify how tension moves from the front neckline and armhole, through the shoulder joint, into the back panel. Consider garment fit, fabric stretch, strap width and intended use. Mark where stress concentrates when the tank is put on, worn and removed. The purpose is not to declare one universal load value. It is to create a representative trial for the product. Record whether the shoulder is a full-width panel joint, a narrow strap connection or another construction because each configuration needs its own evidence.
2. Define the joint before selecting reinforcement
For tank top shoulder seam durability approval, document seam type, stitch formation, seam allowance, thread, needle, layer direction and finished strap width. Include binding or folded edges that meet the shoulder. Reinforcement should answer an observed risk, such as seam opening, stitch breakage or material damage. Adding tape, extra stitches or another layer without a defined purpose can increase stiffness and thickness. Prepare a baseline construction and one or more controlled alternatives so the buyer can compare the effect of each change.
3. Use production-intent fabric
For tank top shoulder seam durability, trial the joint in the nominated fabric construction, weight, finish and colour where possible. Stretch, recovery, edge curl and surface finish affect feeding and seam behaviour. A substitute fabric may help early machine setup but cannot establish final approval. Record fabric code, lot or development reference and conditioning state. If the material changes after the shoulder is approved, review whether the evidence remains applicable rather than automatically carrying the decision into a different fabric.
4. Tank top shoulder seam durability construction comparison
Make full-width specimens that reproduce the narrowest and most difficult approved shoulder configuration. A seam that works on a broad strip may behave differently when intersecting the neckline and armhole finishes. Compare candidate formations using the same fabric and dimensions. Coats’ seam type reference can support accurate construction terminology, while the manufacturer must confirm the actual machines, folders and stitch setup used for the sample.
5. Inspect stitch formation
Review both garment faces for balanced formation, skipped stitches, loose loops, seam grin, tunnelling, puckering and needle damage. Gently open the seam in the direction expected during wear and observe whether stitches recover. Check the start and end security, especially where trimming can leave short thread tails. Record defects and conditions rather than using a vague note such as “seam weak.” The inspection sheet should allow the sample room to reproduce the accepted setup and avoid the rejected result.
6. Evaluate extension without overclaiming
Agree a product-specific extension or movement trial with the buyer or qualified laboratory. Apply the same specimen dimensions, direction, rate and conditioning to every alternative. Note whether failure begins in the thread, stitch formation, seam allowance or fabric. A result from one setup must not become a general strength claim for all tank tops. The approval should state the method, sample history and acceptance basis, including any limitations at the narrowest strap or largest intended body extension.
7. Tank top shoulder seam durability and inside bulk
Turn each specimen to the skin side and measure or compare the finished stack at seam intersections. Feel the edge transitions and look for ridges, stiff back-tacking or concentrated thread. Coats’ guidance on soft and secure seams provides useful technical context for balancing security with comfort. Final acceptance still belongs to the actual garment trial because material, fit and placement determine what reaches the wearer’s skin.
8. Check neckline and armhole intersections
The shoulder joint often meets binding, cover stitching or turned edges. Build the complete intersection instead of testing the body seam alone. Confirm that seam allowances lie in the specified direction, edge finishes remain even and no trimmed corner can unfold. Compare left and right shoulders for symmetry. If an intersection needs grading or trimming, include the exact sequence in the construction note so operators do not solve bulk differently from garment to garment.
9. Review attachment alignment
Match front and back seam points, strap edges, neckline shape and armhole curve before sewing. Misalignment can create torsion that looks like a durability problem later. Use notches or approved reference points and record allowable visual tolerances. After sewing, lay the garment flat and then place it on an agreed form to check whether the joint rotates, lifts or pulls. Do not force a distorted sample flat for photography; retain the natural result as evidence.
10. Include representative sizes
Test at least the sizes or size groups that create meaningful differences in strap width, body extension or joint position. Grading may keep one width constant or change it across the range; either choice requires confirmation. Record the pattern reference and finished shoulder dimension for every specimen. If one construction does not work at a size extreme, define a controlled size-specific solution instead of allowing an undocumented production adjustment.
11. Tank top shoulder seam durability after care
Apply the agreed laundering or care process and re-inspect appearance, extension, seam allowance position, thread condition and skin-side bulk. Fabric shrinkage can change the stress relationship between body and stitches. Record the care method, number of cycles and specimen identity. Avoid statements such as “wash proof” unless supported by an appropriate defined programme. The buyer should approve the evidence that matches the intended care label and market expectations.
12. Create a failure-mode record
For every rejected sample, identify the first visible failure and its location. Examples include stitch rupture, seam slippage, fabric tear near the needle line, binding separation, excessive extension loss or an unacceptable ridge. Photograph and label the condition, then change one controlled variable for the next trial. A structured record prevents teams from repeating unsuccessful combinations and shows whether an improvement solved the original problem or merely moved it elsewhere.
13. Build the shoulder-joint trial card
Include style and size, fabric reference, finished shoulder width, seam code, stitch type, thread, needle, stitch density, seam allowance, reinforcement, intersection method, sample condition, trial method, observed failure, inside-bulk assessment, care history and approval owner. Link the card to the current technical pack. Keep provisional settings clearly marked. The approved card should represent one reproducible joint, while alternatives and rejected trials remain archived for traceability.
14. Tank top shoulder seam durability for low MOQ planning
For a low MOQ tank top manufacturer programme, standardise a proven shoulder construction across compatible styles and colours where the fabric and geometry permit it. This can reduce repeated setup work, but it does not remove the need for product-specific trials. Ask for confirmed sample scope, material availability and production conditions rather than an invented universal MOQ. If a special reinforcement or thread requires a separate commitment, show that condition in the quotation.
15. Giving facility to startup brands
SewApparels can support startup brands that provide a target silhouette, fabric, size range, shoulder width and intended use. A focused first trial with a baseline and one controlled alternative is more useful than many undocumented samples. Appoint one approval owner and keep the current trial card with the technical pack. This helps a startup spend development resources on verified changes while preserving a clear manufacturing record for repeat orders.
16. Prepare the quotation and sample request
Send the style drawing, pattern or fit reference, fabric specification, size range, shoulder dimensions, edge finishes, intended seam or performance need, care route and required evidence. Ask the manufacturer to identify sample stages, special machinery, reinforcement materials, testing assumptions, lead times and exclusions. Quotes should distinguish standard construction from optional development. Price should be compared only after suppliers understand the same joint and approval scope.
17. Avoid common mistakes
Common errors include testing a wide strip instead of the narrow garment joint, adding reinforcement before locating the failure, judging only the outside appearance, ignoring binding intersections, using an unrelated substitute fabric for final approval, checking one size, omitting care history and treating one pull result as a universal guarantee. Another mistake is changing thread, needle and seam formation together, which hides the reason for improvement. Use controlled trials and keep evidence attached to each version.
18. Final tank top shoulder seam durability approval
Approve the joint when construction details match the production-intent garment; representative sizes show acceptable formation and alignment; the agreed movement or strength evidence meets the buyer’s criteria; skin-side bulk is acceptable; and post-care inspection is complete. Record limitations and size-specific instructions. Tank top shoulder seam durability is controlled through a balanced, reproducible joint rather than the heaviest possible reinforcement. Share the tank silhouette and material details to begin a focused development brief.
Complete the shoulder-joint approval record
Describe the proposed tank top shoulder joint reinforcement and the agreed tank top strap seam load test. Record any tank top shoulder stitch failure against the exact tank top strap attachment sample. Pair the result with a tank top seam bulk inspection, including the tank shoulder seam intersection bulk and each controlled tank shoulder thread trial.
The approval file should preserve tank strap joint strength evidence, the tank shoulder seam after care observation and the measured tank strap joint extension. Identify the first tank shoulder attachment failure mode and review the tank shoulder contact surface. Complete a tank seam joint sample comparison, document the accepted tank strap stitch formation and issue one current tank shoulder seam specification card.
Shoulder-joint checklist
- Load path and joint type are defined.
- Production-intent fabric and dimensions are used.
- Stitch formation and failure mode are recorded.
- Strength evidence is paired with inside-bulk review.
- Neckline and armhole intersections are complete.
- Representative sizes and care states are checked.
- Rejected alternatives remain traceable.
- One approved trial card controls production.
