
SEW APPARELS · BUYER RESOURCES
6-Panel Cap Buying Guides
6-panel cap buying guides help brands connect cap construction, front-seam embroidery and sample approval before placing a custom order. Begin with the centre-seam embroidery article, then organize the crown reference, fabric choice and artwork into one development brief. Keep the cap style and logo versions identifiable throughout sampling. The aim is a clear decision record that the brand, cap supplier and decorator can review together before production requirements are finalized.
A six-panel construction does not define one universal crown height or decoration area. Structured and relaxed caps can require different sample discussions, even when they carry the same logo. Use these 6-panel cap buying guides to separate the preferred silhouette from the technical decisions needed to reproduce it. Share the intended wearer, visor shape and decoration dimensions, then ask the supplier which details require a physical trial on the proposed cap.
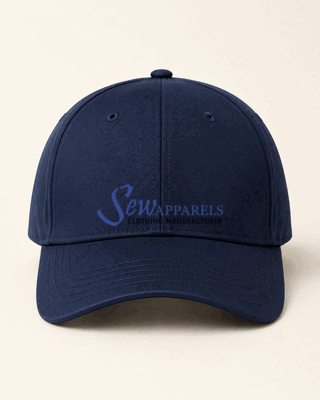
Start with centre-seam embroidery planning
Review logo split alignment, small lettering and backing placement on the actual six-panel cap. Use seven checks, an annotated construction example and a buyer decision table to prepare clear sample comments.
Read the centre-seam embroidery guideCrown panel geometry: profile, seams and fit
Compare six-panel crown shape, seam placement and panel proportions before approving a cap sample. Use the technical guide to document fit and construction decisions.
Read the crown panel geometry guide1. 6-Panel Cap Material Metamerism Approval
Map every tonal component, control physical colour masters, review the assembled cap under agreed lights and document substitutions with signed shade evidence.
Read the multilight colour approval guide2. 6-Panel Cap Needle Hole Damage
Map seam damage, compare controlled sewing setups, separate displaced from cut yarns and approve a retained production reference with bulk-lot controls.
Read the needle-hole investigation guide3. 6-Panel Cap Sweat Colour Transfer Testing
Map dark and pale component contacts, distinguish perspiration from rubbing, submit representative pairs and approve buyer limits for each covered colourway.
Read the perspiration-transfer guide4. 6-Panel Cap Top Button Attachment Review
Identify the complete covered-button system, inspect concealed parts, compare sample variation, agree suitable retention evidence and control repairs before bulk release.
Read the top-button attachment guide1. Use These 6-Panel Cap Buying Guides to Define the Cap
Start with a cap reference that shows the intended crown structure, front angle, visor and closure. Identify the shell fabric and any internal support separately, then explain which features of the reference should carry into the new style. These 6-panel cap buying guides help the buyer organize the questions before sampling. Keep fit, shape and decoration decisions identifiable so a change in one area can be assessed for its effect on the others. A visual reference should support the written brief, rather than replace it.
Record the target wearer or agreed fit reference and the intended wearing position. Ask how the supplier will present the sample during measurement and review, especially when comparing a relaxed crown with a structured one. Keep the sweatband and closure details in the file alongside the shell fabric. If a prototype uses substitute materials, label that limitation and agree which approvals remain open. Consistent references make sample comments easier to interpret and help prevent a preferred appearance from being lost during later changes to materials or construction.
2. Plan Centre-Seam Embroidery Before Final Artwork Approval
Use the centre-seam embroidery article to review logo balance, thin borders and lettering that crosses the front seam. Supply the original artwork and its intended finished dimensions, then ask the decorator to assess it for the actual cap. These 6-panel cap buying guides keep the artwork discussion connected to crown shape and support. A screen preview can communicate the design, but a sew-out is needed to evaluate the result. Keep the artwork revision and stitch-file identity associated with the sample being reviewed.
Review the front, side and inside of the decorated cap. Record the centre-line reference, visor clearance and any deliberate visual offset used for an asymmetric mark. Separate a cap assembly issue from an embroidery placement issue before requesting changes. If small lettering loses definition near the seam, ask whether the artwork, digitizing or sample setup needs review. Approve any proposed artwork simplification before it is used in production. A complete comment should identify the affected detail, describe the intended result and state the evidence needed for the next decision.
3. Connect Shell Fabric, Crown Support and Visor Choices
Treat the fabric, crown support and visor as a complete construction proposal. A replacement material can alter the way the front presents or how the decoration sits, even when the panel pattern stays the same. These 6-panel cap buying guides encourage a material record for every sample. Identify the shell reference, lining or reinforcement, sweatband, closure and visor insert where relevant. Ask the supplier to explain substitutions and confirm which sample is representative of the proposed production combination before approving the final appearance.
Compare revisions using the same presentation and review method. Keep the cap centre and visor centre visible in the front view, then assess the overall silhouette from the side. Note whether a concern relates to crown depth, band fit, panel symmetry or visor balance. Avoid changing several unrelated details without recording the reason. A focused revision gives the supplier a clearer problem to solve and helps the buyer understand the result. Retain approved features in the brief so later corrections do not unnecessarily reopen decisions that have already been closed. Use our six-panel crown geometry guide to document panel curvature, top button position and front-height reference points before approving the construction.
4. Use Technical Embroidery References with Sample Evidence
The machine manufacturer’s Melco cap digitizing guidance describes the relationship between cap profile, available design area and sewing sequence. Its cap embroidery overview covers framing, support and registration considerations. Use these references to frame questions for the decorator rather than impose one machine setup on every cap. These 6-panel cap buying guides focus on buyer decisions: identify the proposed construction, request a relevant sew-out and review the evidence against the agreed artwork and appearance.
Keep the embroidery setup record with the sample, including any backing or framing changes the decorator identifies between revisions. Review the inside finish as well as the visible logo, and record whether the cap represents the quoted production materials. If a sample proves only one part of the design, identify the outstanding approvals. The final development file should distinguish accepted details from provisional ones. This gives the brand and production team a practical record to revisit when artwork, fabric, cap structure or decoration requirements change before a repeat order.
5. Low MOQ 6-Panel Cap Manufacturer: Compare Material Routes
When comparing a low MOQ 6-panel cap manufacturer, identify the material route before assuming that every development option shares the same minimum. Sew Apparels currently displays 576 pieces with matching export-quality stock fabric or 5,184 pieces with custom fabric, per colour and style. Use these 6-panel cap buying guides to prepare the construction and artwork brief before requesting a quotation. Confirm the available fabric match, decoration method and any separate trim requirements. The final price and order conditions should describe the specific route quoted for your cap.
6. Support for Startup Headwear Brands
Sew Apparels welcomes startup headwear brands and prioritizes early-stage development discussions. Share the target customer, cap reference, artwork, budget range and launch plan so the team can discuss a suitable sampling route. These 6-panel cap buying guides help a new brand organize the decisions that need approval. Keep the initial style range focused and ask the quotation to identify sample charges, development costs and material conditions. The product page lists sampling at 10–15 days and production at 15–30 days at MOQ after PP approval; confirm timing for the actual order.
Turn cap construction and artwork into a clear product brief
After using these 6-panel cap buying guides, collect the cap reference, material route, artwork dimensions and sample comments. Visit our custom 6-panel cap manufacturing page to discuss the proposal with Sew Apparels. Confirm the approved cap and decoration versions before releasing production requirements, and keep any remaining development questions visible in the brief.
Explore 6-panel cap manufacturing